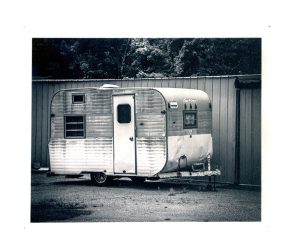
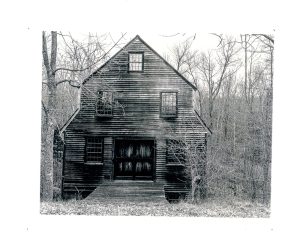
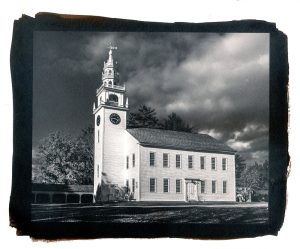
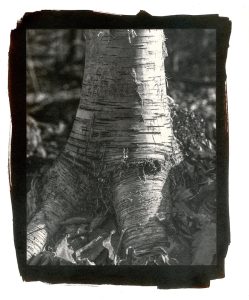
In the past week I have carved out enough time for two salted-paper printing sessions. The result is four prints on 8×10 inch Hahnemühle Platinum Rag paper. The images are 6×7.5 inches. The prints are all gold/bicarbonate toned.
The first two images are from old exposures. The camper from August 2023 and the mill from November 2022. The meeting house exposure is from last month (October 2026) and the birch tree from a few days ago (November 2026).
The edges of the first two prints were masked during exposure giving ‘clean’ edges. The other two images show the ‘organic’ edges that come from brushing the light sensitive silver nitrate onto the paper. (Details of my masking experiments appear below the images… proceed with caution!)
**** WARNING **** WARNING **** WARNING **** WARNING ****
Alt process printing minutia below. Proceed at your own risk!!!
*****************************************************************************
I have been experimenting with materials/techniques for masking prints during the printing process. Masking gives ‘clean’ borders as shown in the first two prints shown above. Experimentation is necessary because the traditional material for masking, RubyLith, has become obsolete for its mainstream use in the printing industry. Thus, it has become hard to source and expensive.
RubyLith is a red plastic film that is opaque in the ultraviolet wavelengths (allowing it to act as a mask for alternative process printing) but transparent in the visible wavelengths (which allows for easy alignment of the mask, negative and sensitized paper). There are many other red plastic films available. I have tried roughly a dozen of them as masks. Alas, none of them are opaque enough to UV light to be effective masks.
Therefore I have turned to materials that are opaque to both UV and visible light. Such materials should be effective masks but come with the ‘price’ of more awkward handling when trying to align the visibly opaque mask and negative to make a print.
The simplest, commonly available material that is opaque to both UV and visible light is probably aluminum foil. ‘Regular old’ kitchen aluminum foil is nicely opaque to UV light. However, even the heavy-duty grades are way too thin to handle conveniently as masking materials. They tear and wrinkle as you try to make masks with them.
I briefly experimented with laminating aluminum foil from the kitchen to thin plastic sheets. This works quite well. However, one has the added complication of gluing two thin sheets together. Not for every print as the laminates are fairly tough and certainly reusable but the gluing does add ‘fussiness’.
Thus, I went on the hunt for aluminum foil that is thicker and therefore more easily handled than the materials made for kitchen use. I have found two. An aluminum foil meant for craft/art projects (link to Amazon) and Rosco Matte Black Cinefoil (link to B&H Photo). Both of these materials work well as masks and are certainly robust enough to be reuse for a while. I was mildly concerned (because of stray light) about using the highly reflective material from Amazon as a mask but this does not seem to be an issue.
The crafting/art material is less expensive and, in my limited testing thus far, seems like it will hold up better than the Cinefoil upon reuse. Thus, this would be my recommendation if one wants to try this out for yourself.
I am still working out the best/simplest/quickest method for aligning the mask, the negative and the sensitized area of the paper but although working with the visibly opaque masking materials. This ain’t rocket science as they say. I’ll just have to get used to something new.
That said, I’ll continue to make most of my prints unmasked. I tend to use masking only when planning a portfolio of unmatted prints.
Amazing! The processing is time consuming and exacting. I would not have the patience to even start it, let alone know what you are talking bout!! For me, the Mill Building and the Meeting House captured the process the best.
Great images! Strong contrast and full tonal range. The image of the trailer is my favorite.
My personal preference is to show the raw edge. After all, if you sensitized the paper by hand, it should look like it 🙂
Your experiments on masking are quite timely for me … I like to try to sensitize a square with straight edges, by hand, and then print using a negative that extends slightly beyond the sensitized square (so that the hard edge of the negative doesn’t show). This gives a straight edge (depending on how well you can paint a straight edge), with a somewhat hand made feel. Then I try to mat the image with a somewhat wider border (1/2 inch all around), revealing the edges of the sensitized square.
The hardest part is trying to keep the white edge of the paper clear of any drips and dribbles. Seems like masking would be something to try to address that.